
Best Method To Open Snipping Tool In Windows 10
It is no compelling reason to install snipping tool on Windows 10. Snipping tool is the work in Windows desktop application for clients to take a screen capture. It is enabled automatically when you activate Windows system.
First of all, the question is “where is my snipping tool on Windows 10”, the snipping tool program lies in your C drive, you can get to This PC > Local Disk (C:) > Windows > System32 and afterward discover the snipping tool .exe application. Yet, it is a waste of time to run the snipping tool in this way.
Method 1: Open it by searching.
Type snipping in the search box on taskbar, and click Snipping Tool in the result.

Method 2: Turn it on in Start Menu.
Get into Start Menu and select All apps, choose Windows Accessories and tap Snipping Tool.

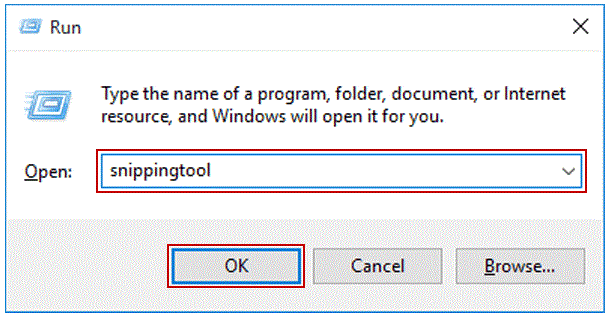
Method 3: Turn it on via Run.
Display Run using Windows key + R key, type snippingtool and hit OK.
Method 4: Turn it on via Windows PowerShell.
Access Windows PowerShell, type snippingtool and tap Enter.

Method 5: Open it via CMD.
Launch Command Prompt, type snippingtool.exe and press Enter.


0 Comments