
How To Install IIS In Windows Server 2019
Internet information services (IIS) is a web server that work on the Microsoft .NET. its developed by Microsoft. IIS supports HTTP, HTTP/2, HTTPS, FTP, FTPS, SMTP and NNTP.
1. Click on windows key and open server manager

2. Click on Add roles and features

3. check box of Role-based or features- based installation

4. Select Web server (IIS) and check the box

5. Click on Add features

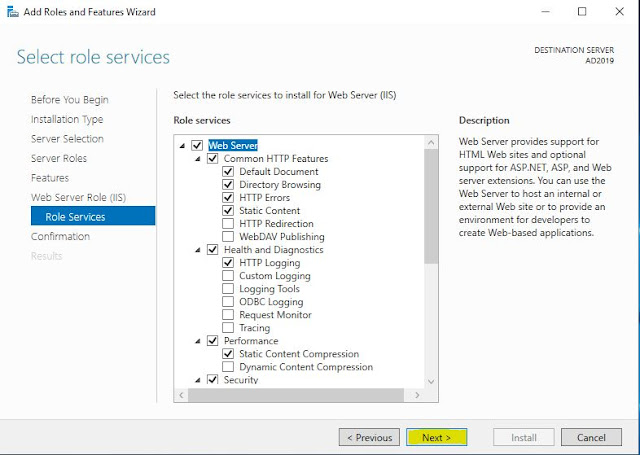
6. Now Web server (IIS) Selected click on Next

7. Click on Next

8. Click on Next

9. Click on Next
10. Check the box Restart the destination server automatically if required and click on yes

11. Click on Install

12. Now installation started

13. Now installation completed click on Close

Now Web server (IIS) installation completed now check where is install IIS
Open server and click on tools

Now open Internet Information Services (IIS) manager

for check the IIS working or not, Open internet and type your server ip address and press Enter

1. Click on windows key and open server manager

2. Click on Add roles and features

3. check box of Role-based or features- based installation

4. Select Web server (IIS) and check the box

5. Click on Add features

6. Now Web server (IIS) Selected click on Next

7. Click on Next

8. Click on Next

9. Click on Next

10. Check the box Restart the destination server automatically if required and click on yes

11. Click on Install

12. Now installation started

13. Now installation completed click on Close

Now Web server (IIS) installation completed now check where is install IIS
Open server and click on tools

Now open Internet Information Services (IIS) manager

for check the IIS working or not, Open internet and type your server ip address and press Enter

Install IIS using PowerShell
If you don’t have the GUI installed and you want to install to IIS. You can easily install IIS using below mention command with PowerShell command line interface (CLI).
1. Open PowerShell with administrative privileges and run the following command.
Install-WindowsFeature -name Web-Server -IncludeManagementTools


0 Comments