
Telnet is a command tool that provides access to a command interface on a remote host. It used to test Transmission Control Protocol (TCP) connectivity.

1. Click on windows key and open server manager

2. Click on Add roles and features.

3. check the box of Role-based or features- based installation.

4. Click on Next.

5. Check the box of Telnet Client and click on Next.

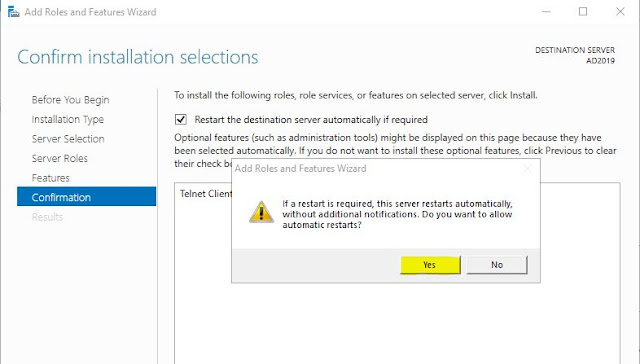
6. Check the box Restart the destination server automatically if required and click on yes.
7. Click on Install.

8. Now installation started.

9. Now installation completed click on Close.

10. Now open command prompt and type telnet 192.*.*.* (Port Number 21) and press enter.


1. Click on windows key and open server manager
2. Click on Add roles and features.

3. check the box of Role-based or features- based installation.

4. Click on Next.

5. Check the box of Telnet Client and click on Next.

6. Check the box Restart the destination server automatically if required and click on yes.

7. Click on Install.

8. Now installation started.

9. Now installation completed click on Close.

10. Now open command prompt and type telnet 192.*.*.* (Port Number 21) and press enter.


0 Comments